
The use case chosen here is pretty simple. Build a Go Web app every time there is a change and deploy it without any downtime. The same concept can be extended to most apps built with technologies such as Java , Python , Node.js etc.
Commit -> Build -> Deploy -> Repeat :
- To automate build, testing and deployment configuration we will be using Wercker.
Why Wercker and not Jenkins — Simply because configuring wercker is as simple as connecting a repo and defining a yml file with the steps it needs to perform to build and deploy.
- We need a platform that supports fault tolerance, scalability and automation, hence we use Kubernetes.
- Applications need to be dockerized and packaged as a pod for them to run on Kubernetes. Hence the Go application selected is built as a container.
- We need a registry to store and act as a container repository and hence we use Oracle managed container registry.
- For ease of setting up and managing Kubernetes on scalable and highly available cloud infrastructure, we use Oracle Kubernetes Engine.
Pre-requisites :
A Github account
- Clone/fork this repo CI-CD with Wercker and Kubernetes
An Oracle Wercker account —
- It’s free , sign up using your Github account.
Managed OKE — Oracle Kubernetes Engine / your own Kubernetes Cluster.
- Terraform to create a managed Kubernetes Cluster on OCI (link)
- OCI Console to create a managed Kubernetes Cluster on OCI (Link)
- Build Your Own Kubernetes Cluster grounds up using Oracle Linux (link)
Managed — Oracle Container Registry
- Or any other private registry with push capabilities.
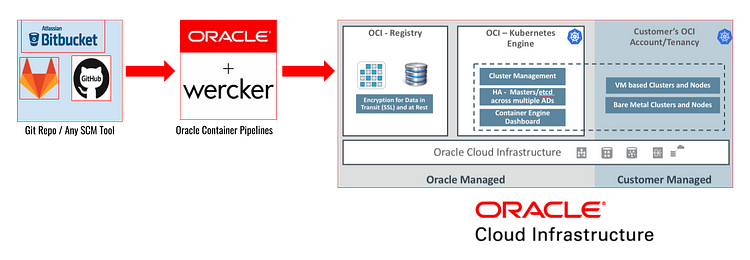
Simplified view of the toolchain from source to deployment
Brief overview on Wercker :
Wercker Overview
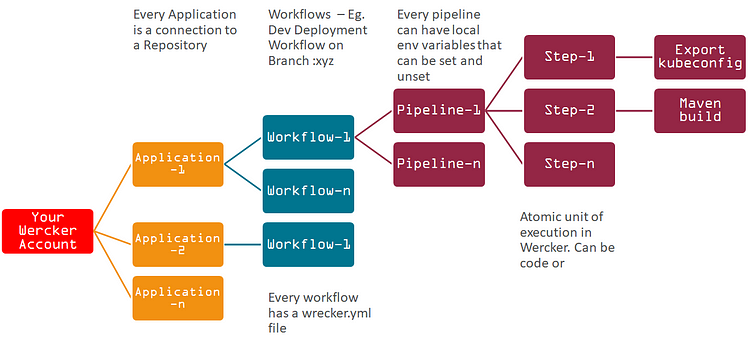
One can think of steps , pipelines and workflows like lego blocks. To allow re-usability at various levels for same or different applications.
Steps
Steps are self-contained Bash scripts or compiled binaries for accomplishing specific automation tasks, defined in the wercker.yml file of your application. Steps can be written manually or borrowed from the community via the Steps Registry.
Pipelines
Pipelines are the heart and soul of Wercker. They’re where you define the actions (steps) and environment for your tasks. They are also often where you define your tests, builds and deploys. They are an aggregate of steps and will pass or fail based on the steps within. Pipelines can be configured to run concurrently, allowing for parallelized testing to save valuable development time.
Workflows
Workflows provide you with a mechanism for managing your pipelines. With Workflows, you can connect your pipelines in series and parallel to form complex, end-to-end CI/CD flows that can take your applications from source to production.
An example
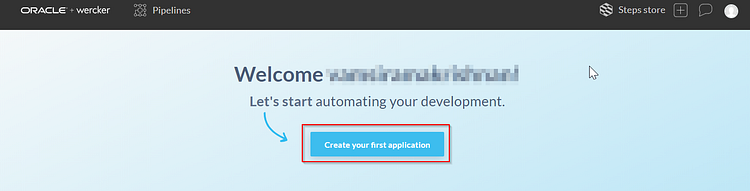
Get Started:
To get started with Wercker , go to the home page
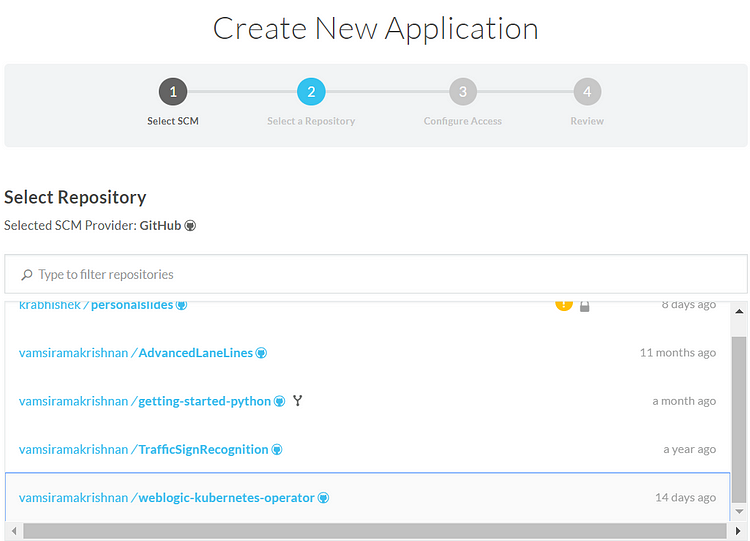
Step 1: Select the SCM Type

Step 2: Select Repository
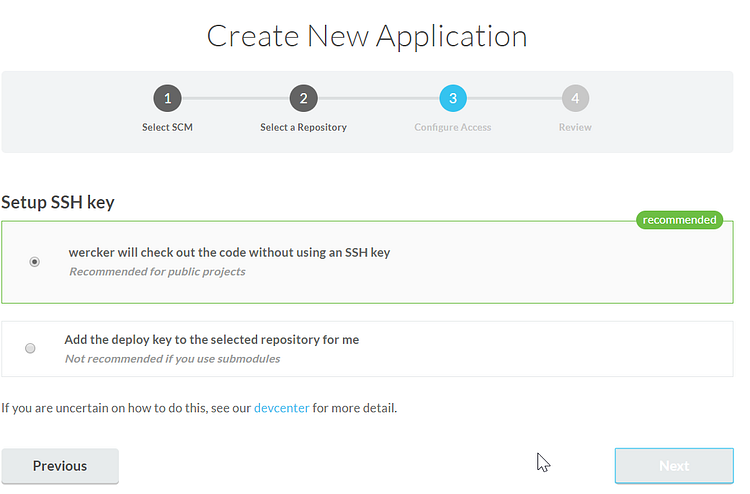
Step 3:Setup
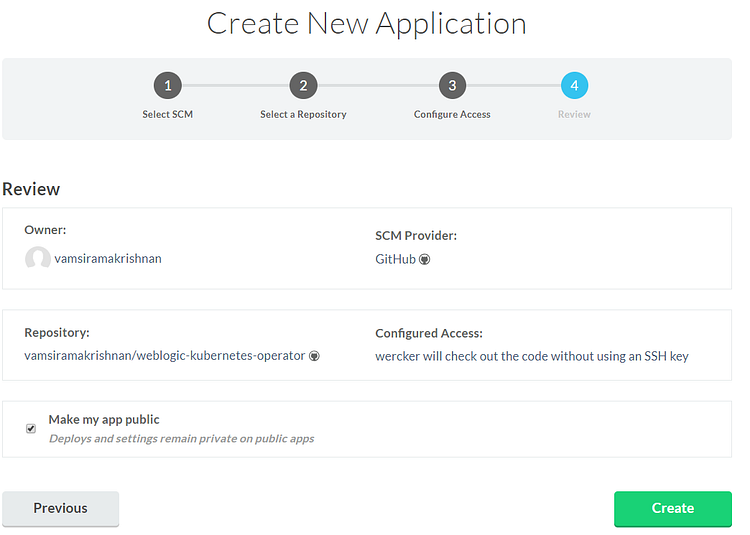
Step 4: Add Application
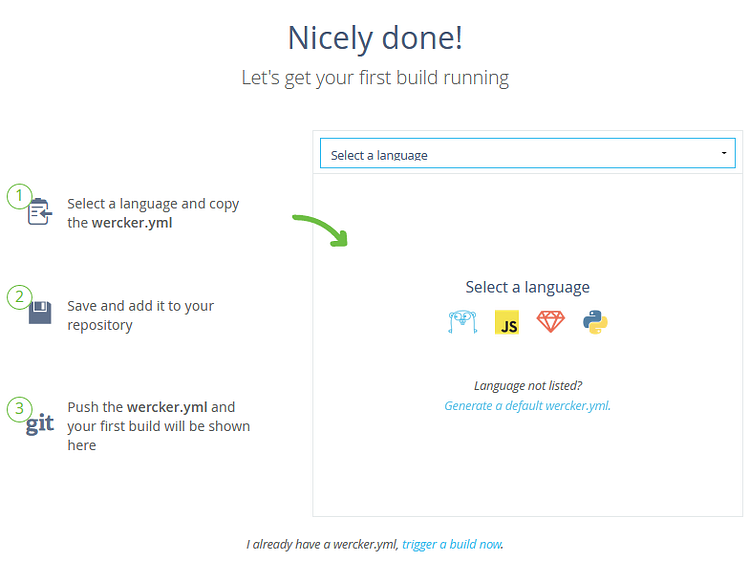
Step 5: (Select language and select wercker.yml)
- Click Create to add the application to Wercker.
- Select “Go” as the repo we have used is a Go Web Application.
- In our case the repo already has a wercker.yml file, so select that option and trigger build now .
- You could also generate the default wercker.yml from here and upload it to the repo.
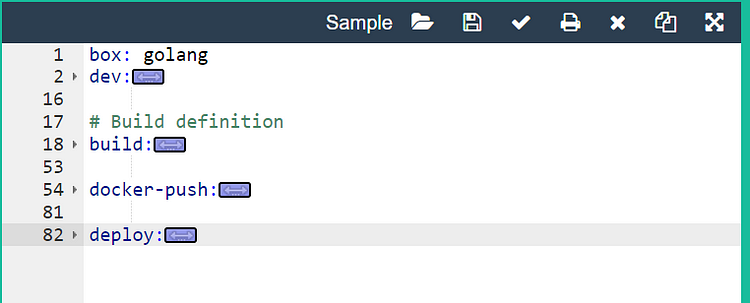
Understanding the current Wercker.yml file
Open the yml file in any good yaml formatter and you will see what is described in the image
- Box: which is a base image based on which we will build our container.
- Build, Docker Push, Deploy are three sequential pipelines within the workflow.
Customizing your own build pipeline
The pipeline can be customized using the kind of steps you would like to execute. It is worthy to visit the step store to see predefined steps that can be re-used in your wercker.yml file.
It is also noteworthy to understand that wercker supports docker and kubectl commands out of the box. Please visit
Configuring Wercker
- We want the build pipeline to execute on commit to the master repo, hence select Git Push in the hook type, the output of the build pipeline is a container.
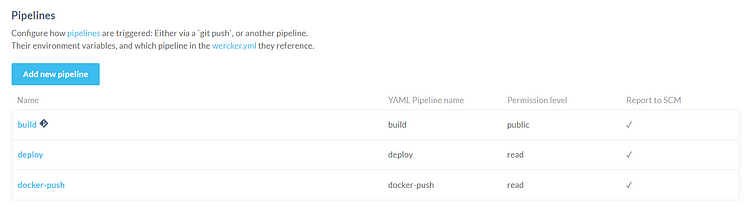
Adding Pipelines
The wercker.yml pipeline name and the name defined here should match
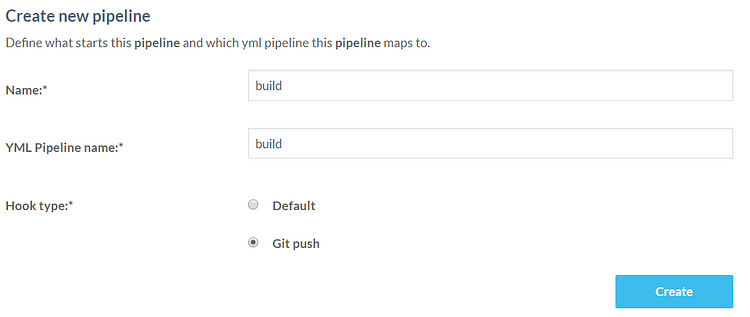
- Push the build container to a private Docker repo and Deploy the docket container onto a Kubernetes cluster but these need to be triggered sequentially. Hence select default in the rest of the pipelines for Hook Type
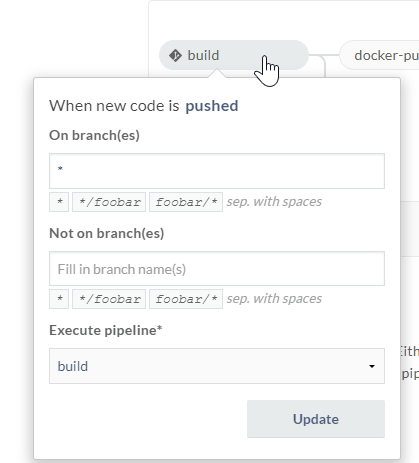
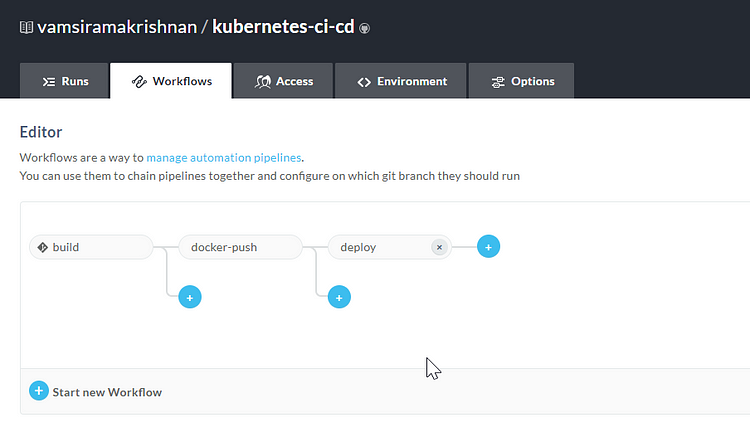
Adding Pipelines to Workflow
To add pipelines to workflow select the “+” icon on the workflow, select your pipeline and add them sequentially/parallelly depending on your requirements
Defining your env variables
Please define the following env variables in the workflow of your application in wercker . Refer gist below for information.
- The env variables provide placeholders for information such as Container Registry details for private image push and pull
- The Kubernetes Cluster End points
- Slack bot webhooks ( Covered in detail in the next post ) to receive notifications on build.
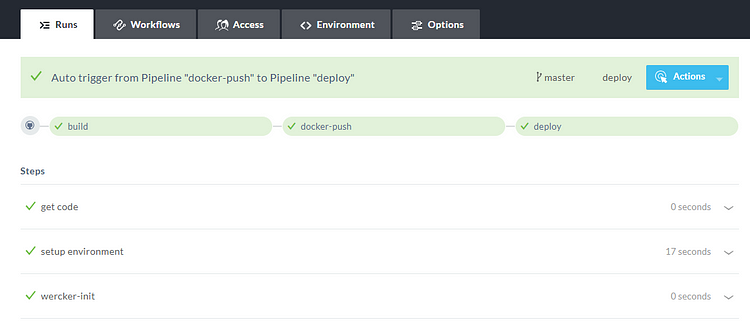
Verifying successful execution
The runs tab provides an interface to check the terminal output and verify the status of each step. You could add a step wise or a pipeline wise slack notifier and also copy app artifacts such as logs and screenshots and define it in the wercker.yml file.
This is an extremely simple yet non-trivial way of setting up your entire build (Wercker) and deployment configuration for not just your application but also your infrastructure ( Kubernetes — OKE )
In the next post I intend to cover ease of setting up CI/CD monitoring with chatbots on Wercker and Kubernetes.
 DevOps on Steroids with Oracle Stack Part 2